If you get the error 0x80200056 when trying to install a new Windows 10 upgrade, here is what you can do to fix the problem. Microsoft’s has released the Fall Creators Update which followed the Creators Update released earlier this year. New update brings lots of interesting new features and improvements to the working of the Windows 10 operating system. Some users are reporting error 0x80200056 when attempting a Windows 10 upgrade on their device. In the following guide, you are going to see the solution to the problem.
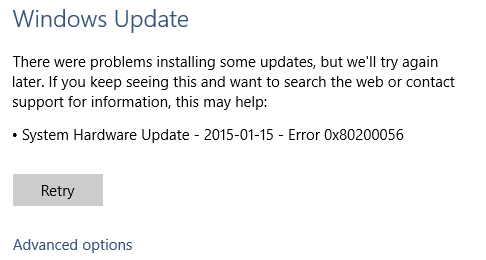
0x80200056 is a common Windows 10 upgrade error. Most of the time this error appears due to accidental device shutdown, restart or interruption caused during the upgrade process for some reason. It could also surface when you sign out from Microsoft account in the middle of the upgrade process.
But it is not that difficult to fix the problem. See the instructions below to fix error 0x80200056 if you are trying to upgrade to a new version of Windows 10 on desktop or laptop.
How to Fix 0x80200056 Windows 10 error
If you face this common error, then you need to start the upgrade process again. Make sure that your computer is plugged in to a power sources and never switches off until the upgrade process is complete.
However, if the problem remains, then follow the steps below:
Run Windows Update Troubleshooter: In Windows 10, there is a built-in troubleshooter utility that automatically scan your computer to identify this error and come up with recommended solutions.
1 – First of all, make sure latest Windows Update Troubleshooter is installed on your device. Here you can download the Windows Update Troubleshooter.
2 – Now Run the Update troubleshooter.
3 – Select Windows Update and then click Next.
4 – Click on the Try Troubleshooting as an administrator option, if promoted. Select the option again and hit the Next button.
5 – Wait for the troubleshooter to find the problem and click Close when done.
6 – Now re-launch the utility, but this time select Windows Networking Diagnostics, which is to resolve any network related issues that prevent updates from downloading on your computer.
7 – Allow the troubleshooter to fix the problem and hit close when the process is complete.
8 – Restart your device.
9 – After restart, go to Settings > Update & security > Windows Update, and try to install the update once again.
All done. However, if the problem doesn’t go away, then you can try to clean temporary setup files from your Windows 10 system and try again.
Disk Cleanup to Remove Temporary Setup Files on Windows 10: Here are the steps that you can perform:
1 – Hit Start button.
2 – Search Disk Cleanup utility and click on it.
3 – Click the Clean up system file button in the utility.
4 – Next, select Windows Setup temporary files and Temporary Windows installation files.
5 – Hit OK and restart your computer.
After restart, go to Settings > Update & security > Windows Update and update your system once again.
However, if the problem remains then you can use Windows 10 Media Creation Tool to install the update.