Here are the simple steps that will help you to edit the hosts file on Windows 10 so that it can be configured manually to map hosts names to IP addresses on desktop PC or laptop. This useful guide is will be of great help to you in order to edit the Hosts file manually to override the DNS settings for a particular domain or computer. Hosts files have been a part of the Windows operating system for a long time now, and have many useful tricks that can save you plenty of hassle in configuring IP addresses and host names.

The ability to manually configure the hosts file on Windows 10 has many uses: it can be used in scenarios such as when you are moving a website to a new host provider, and you need to transfer the files to the new server before switching the domain to the new IP address. It’s also handy when you want to block certain websites from being accessed using your computer. Or when you don’t have a local DNS server configured in the network, and you need to map an IP address to a computer name so you can contact the device using its name.
Whatever your need for remapping hosts file, it’s very easy to edit the hosts file on Windows 10 for the required purpose. All you need is the Notepad and follow the steps below.
In this guide, we are going to show you the steps to modify the hosts files on Windows to map host names to IP addresses. You can use this guide for Windows 8.1 and Windows 7 as well.
How to Edit the Hosts file on Windows 10 using Notepad
In order to modify the hosts file, you need to add two entries, including the IP address of a remote host or application to a the address you want to use.
1 – Open Start.
2 – Search Notepad, right-click on the Notepad icon and select to Run as administrator.
3 – Click on File > Open.
4 – Navigate to the following path: C:\Windows\System32\Drivers\etc\
5 – Select All Files from the drop-down menu.
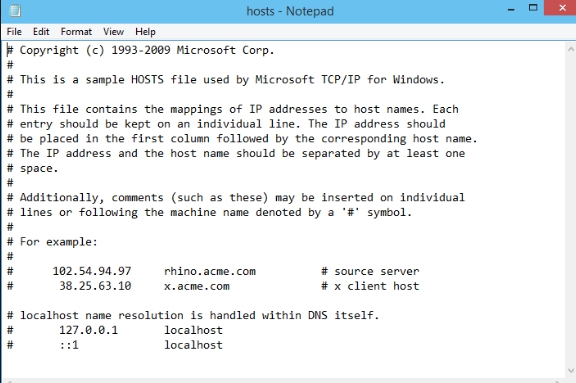
6 – Double-click the hosts file.

7 – Type the IP address of the remote host followed by the domain name or computer name you want to use. Make sure to enter one entry per line.
8 – Click File > Save.
9 – All done.
Now to test whether the changes have been implemented successfully, open Command Prompt and type the ping command (e.g., ping microsoft.com) to ensure the host is connected properly.
To block your computer from reaching certain websites, you can use the loopback address (127.0.0.1) followed by the domain name (e.g., 127.0.0.1 <website name>.com). Windows Firewall or a third-party security software can also be used to perform this task.