Here see how to fix DNS Server Not Responding on Windows 7, 10, 8, 8.1 desktop PC or laptop. ‘DNS Server is not responding’ error is a common Windows error that afflicts many desktop PC or laptop devices running on Windows operating system. This Windows PC error occurs when you to connect your device to the internet but it doesn’t connect to any available network. Windows prompts you to run Windows Network Diagnostics to get more information about what’s causing no internet connection problem on your PC Windows. When you run troubleshoot to find the reason behind the internet connection error, it displays this message on a Windows Network Diagnostic windows “Your computer appears to be correctly configured, but the device or resources (DNS Server) is not responding”. See the image below for visual representation of the DNS server error on Windows PC.

The DNS Server not responding error frequently occurs on older Windows 7, Windows 8 / 8.1, Vista or earlier versions of Windows OS. However, some Windows 10 users are also reporting this issue that keeps on appearing on their devices. Especially those who have upgraded from the previous Windows 7 or Windows 8 could face this DNS Server not responding issue in Windows 10. For all those and even those with new Windows 10 devices, we’ve outlined several solution methods below. I’ve also been on the receiving end of DNS Server error on Windows PC, and after testing various methods, i have come to the conclusion that follow solutions are the best fixes to solve DNS Server not responding (no internet connection) error on Windows powered devices.
How To Fix DNS Server Not Responding in Windows, The Best Ways:
Here are some of the best solution that i could think of to fix DNS Server Not Responding issue on any Windows 10, 7, 8, 8.1 PC desktop or laptop.
Fix 1 – Re-enable Windsock Registries To Fix DNS Server Not Responding
This first solution method involves re-entering/adding Winsock Registries to fix DNS Server not responding issue in Windows. Backup winsock registries and delete them. Restart PC. Add winsock registries from backup and restart PC again. This should fix the problem. Here are the steps for performing this method on Windows PC.
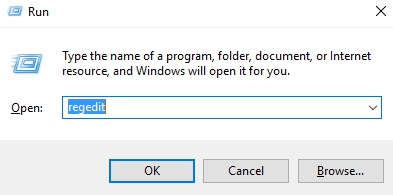
1 – Press Windows + R keys on keyboard to open RUN dialogue box.
2 – Type regedit and hit enter to open the registry editor in Windows.
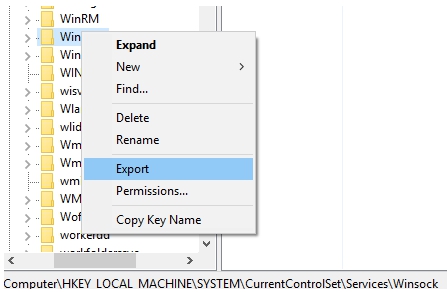
3 – In the Registry editor, head over to HKEY_LOCAL_MACHINE > SYSTEM > CurrentControlSet > Services

4 – Under Services, find the ‘Winsock’ registry on the list, right-click on it and select Export from the context menu.
5 – Name it winsock1.reg and hit Save button.
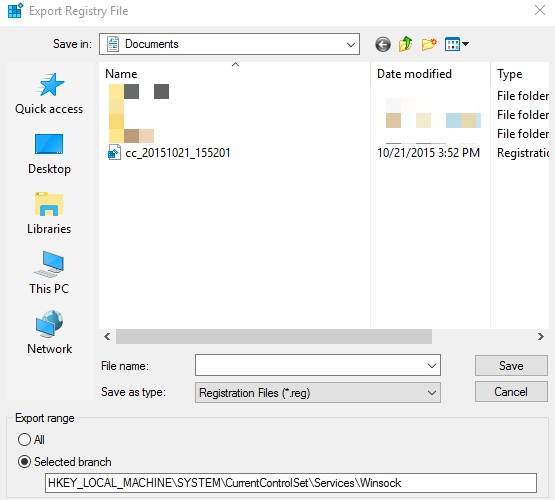
6 – Repeat the above steps for creating Winsock2.
7 – Now, delete both Winsock and Winsock 2 registries from the registry editor.
8 – Restart PC.
9 – Reopen Windows registry editor, head over to the same location.
10 – Click on File from the menu bar and select Import
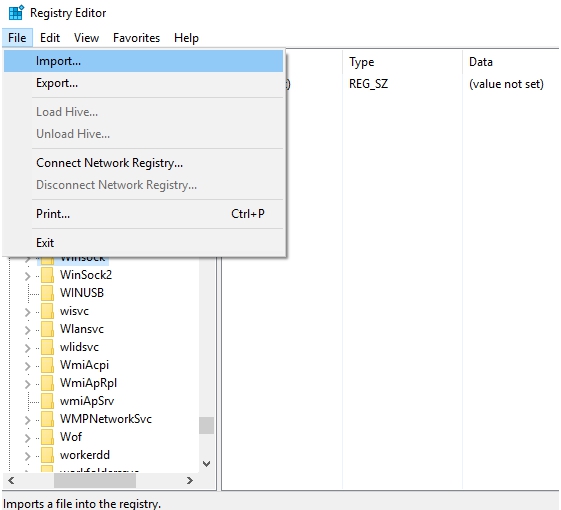
11 – Select the backup registry from the location where you saved it on PC and open it.
12 – Restart PC to finalize problem.
All done. This should the DNS Server is not responding problem on Windows PC. If this didn’t work, see the next solution.
Fix 2 – Disable NetBIOS To Fix DNS Server Error On Windows PC
Please bear in mind that NetBIOS is in no way directly linked to the DNS Server issue in Windows as the problem usually arises due to registry errors or incorrect configurations. However, you can try to disable NetBIOS linked to your internet connection if you are not using a home network or your Windows device is not connected to a corporate network. Some Windows users have been reporting that this has resolved DNS server problem on their devices. Here’s how to implement this method:
1 – Navigate to Control Panel > Network and Internet > Network and Sharing Center. To directly access Network and Sharing Center, right-click on ‘WiFi’ or your network icon on the taskbar and select ‘Open network & sharing center’ option.
2 – Click on the Network connection that’s current active and linked to your device to open general status option box and click Properties button.
3 – Double click on Internet Protocol Version 4 (TCP/IPv4) properties option.
4 – Now click on Advanced button.
5 – Enable/check Disable NetBIOS over TCP/IP option and hit OK button.
6 – Close all open windows.
That’s all. Now see if this fixed the DNS Server Problem on PC Windows. If The problem remains, see the next solution.
Fix 3 – Fix Network Address To Solve DNS Server Is Not Responding In Windows
This is perhaps the best and most effective method to fix DNS Server (no internet connection) in Windows. See the steps below:
1 – Navigate to Control Panel > Network and Internet > Network and Sharing Center.
2 – Click on Change Adapter Setting.
3 – Select the network adapter for your device, right-click on it and select Properties to go to the properties box.
4 – Or Simply, right-click on the network icon on the taskbar, select ‘Open Network & Sharing Center’ and click on your active network icon to open the general information box from where click on ‘Properties’ button to open Properties.
5 – Double-click on Internet Protocol Version 4 (TCP/IPv4) in Properties.
6 – Enable ‘Use the following DNS Server addresses’ box.
7 – Now you need to manually set DNS server by entering in the ‘Preferred DNS server’ box > 8.8.8.8 And in the ‘Alternative DNS server’ box > 8.8.4.4
If those above values don’t work, use 208.67.222.222 and 208.67.220.220 in the DNS server box.
8 – Make sure ‘Validate settings upon exit’ box is enabled and hit the OK button.
9 – Click on the Start button, type cmd to open the command prompt in Windows.
10 – Type IPCONFIG /ALL in the command prompt and hit enter.
11 – Now, in the ‘Wireless LAN adapter Wireless Network Connection’ list, note down the Physical Address value.
12- Press Windows + R keys to open RUN command box.
13 – Type NCPA.CPL in the RUN command box and hit enter.
14 – Next, in the Network connection properties, click Configure and select Advance tab.
15 – Under ‘Properties’ box, select Network address option on the list.
16 – Now check the Value option box and enter the physical address that you noted down in Step-11.
17 – Hit the OK button.
18 – Restart PC.
All done. This will fix DNS Server is not responding error in Windows. Please note that in some cases, you need to update network adapter and disable Windows firewall. If the DNS server error remains, revert back to the original network settings by setting your network address ‘not present’ as before in the Advance tab in network adapter properties.
Wrap Up
If none of the above methods work to fix DNS Server problem on your device, flush DNS and reset network connection settings back to the original. Well, if nothing else worked, you need to reinstall Windows to fix the issue permanently. For feedback or queries, get in touch in comments section below.
Also See on AppsforWin10:
How to Uninstall & Reinstall Built-in Apps on Windows 10
How To Send Texts (SMS) From PC Windows 10 Using Skype
How To Fix No WiFi Available in Windows 10
How to Set VLC as Default Media Player in Windows 10.