Sick of default theme styles and appearance and want to create your own stylish themes for PC Windows 10? then you have come to the right place for a fix. In this post you will learn how to create your own custom Windows 10 themes and set them as desktop theme. Whats more you can show friends your create side by sharing themes with them.
Following instructions will take you through the theme creation and installation process on Windows 10. So let’s start without further ado.
How to create and install your own Windows 10 theme:
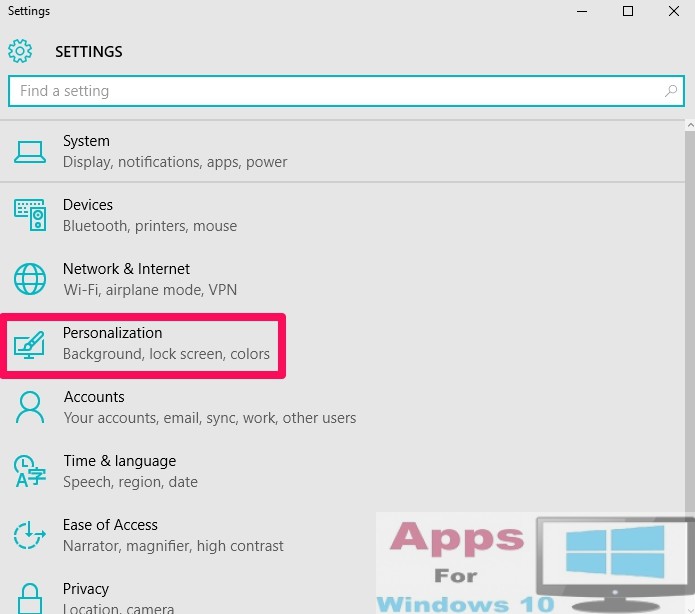
1 – Go to Start > Settings and click on Personalized option on the Settings Window.
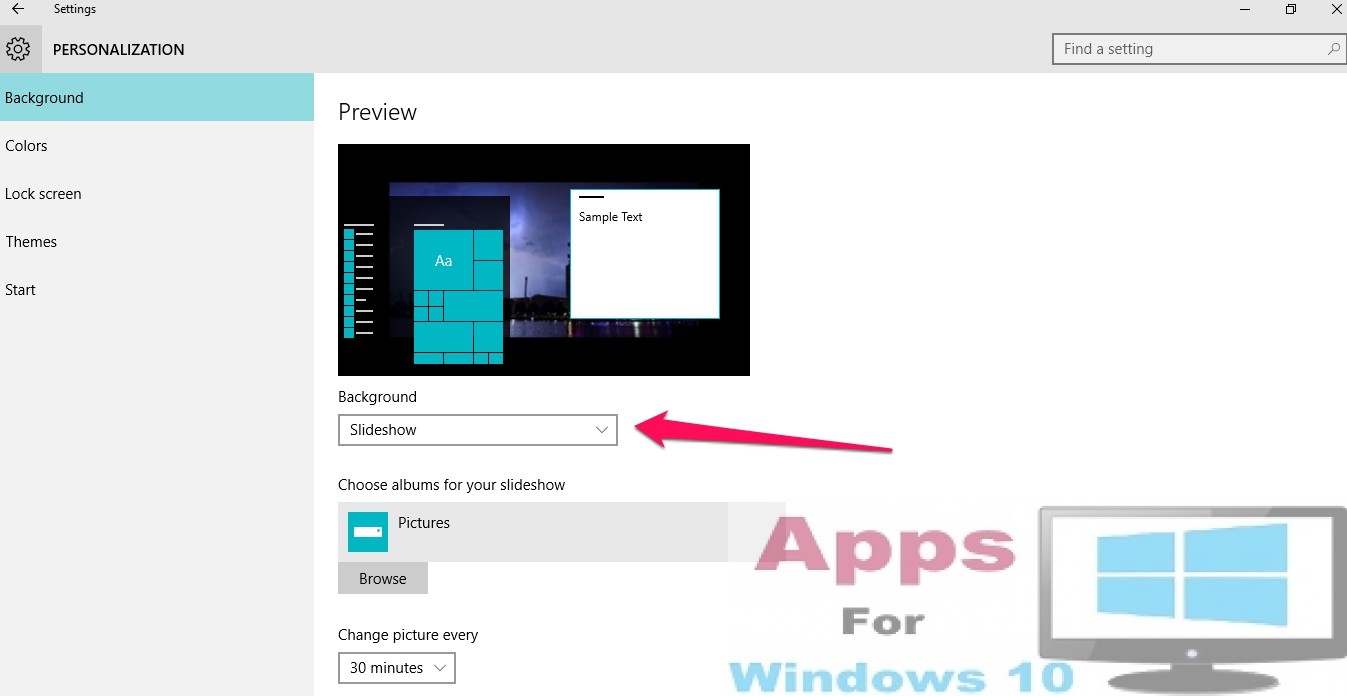
2 – In Personalized Windows, click Background on the left-hand pane which will open theme settings on the right-hand side of the window. In Background under Preview, you can select to set picture, solid color or slide show options from the drop-down menu. Either select the default picture or browse it. If you choose Slideshow option, Windows will show pictures in default Photos Folder in the slideshow, you can choose the time each picture appears on the screen or browse to the picture folder you want to set as slideshow.
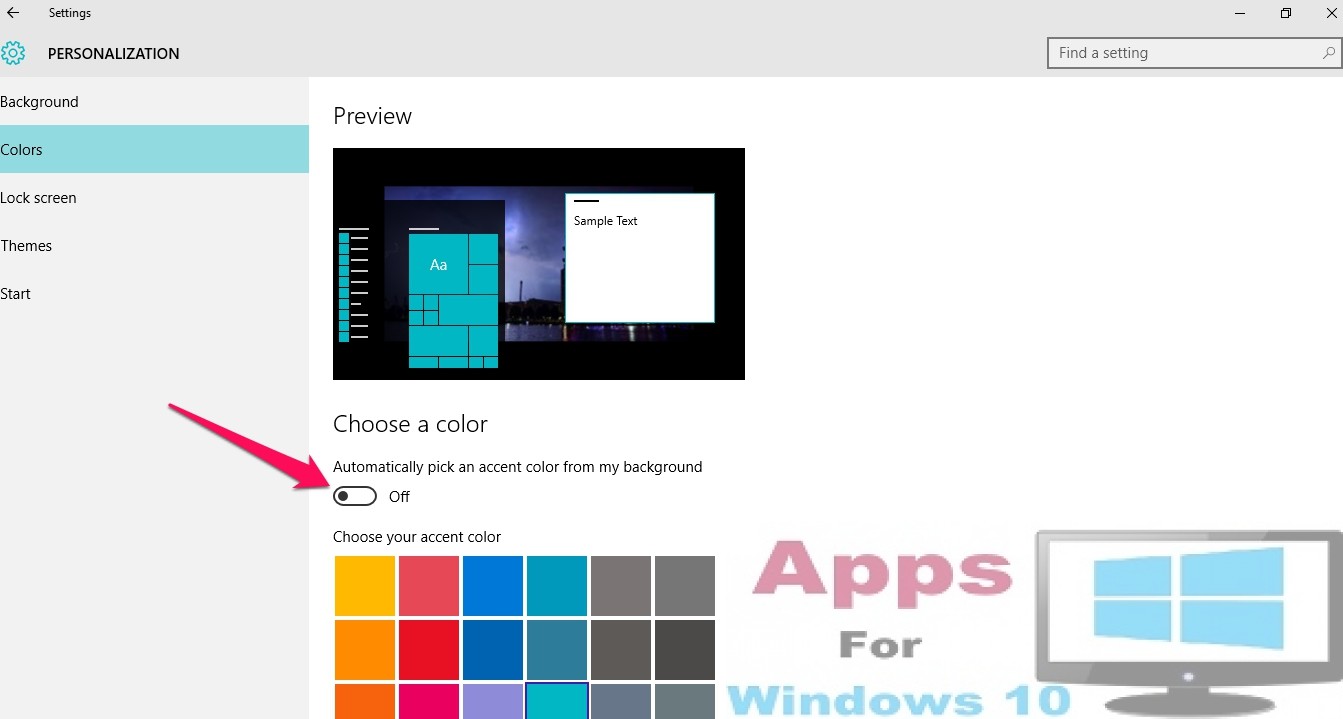
3 – Next comes Colors option in which you can set background colors either automatically or manually pick them from the list given in the window. Also select Start button, Start menu, Task bar colors. You can choose to make Start, Task bar and action center transparent or opaque from here. You can preview changes before saving them.
4 – Please note that Lock Screen settings under Personalization are not part of your theme settings, set lock screen background related settings and not the them you are creating.
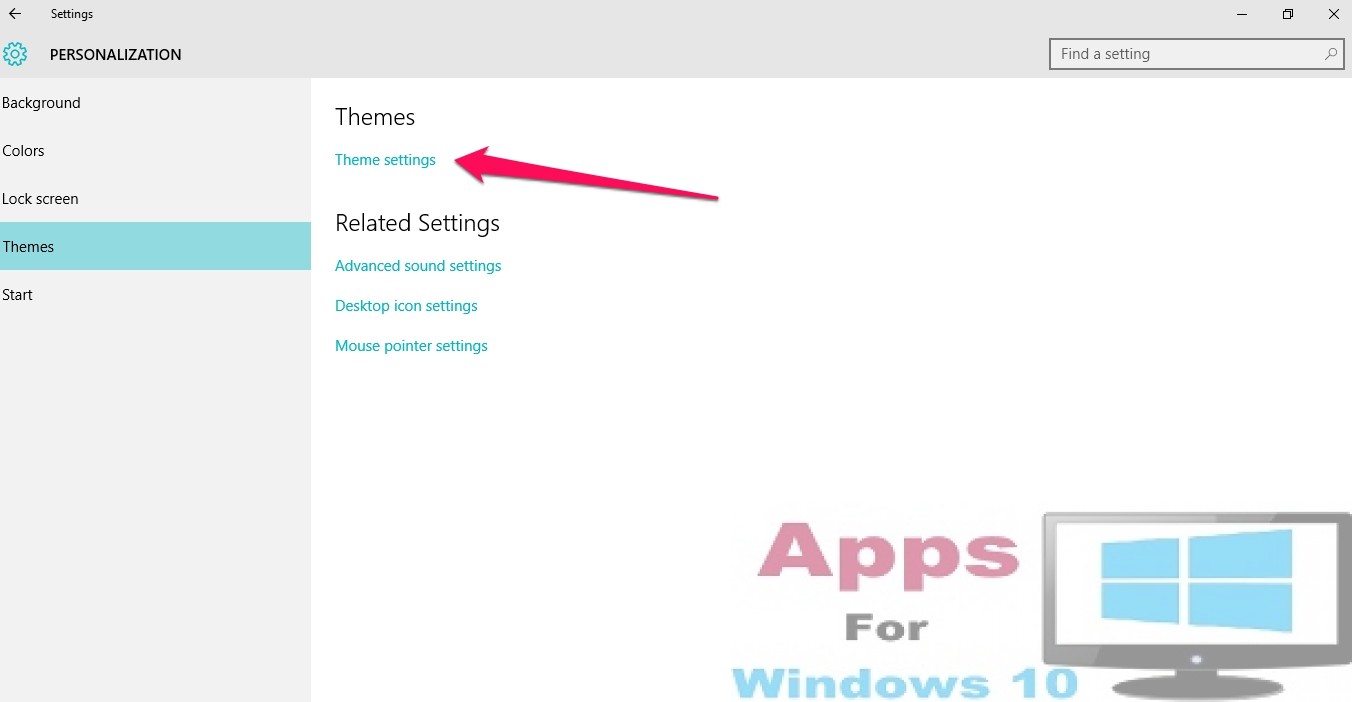
5 – Next select Themes below Lock screen option and click Theme Settings on the right-side pane of the Personalization window. A new windows opens containing all personalization settings in Control Panel.
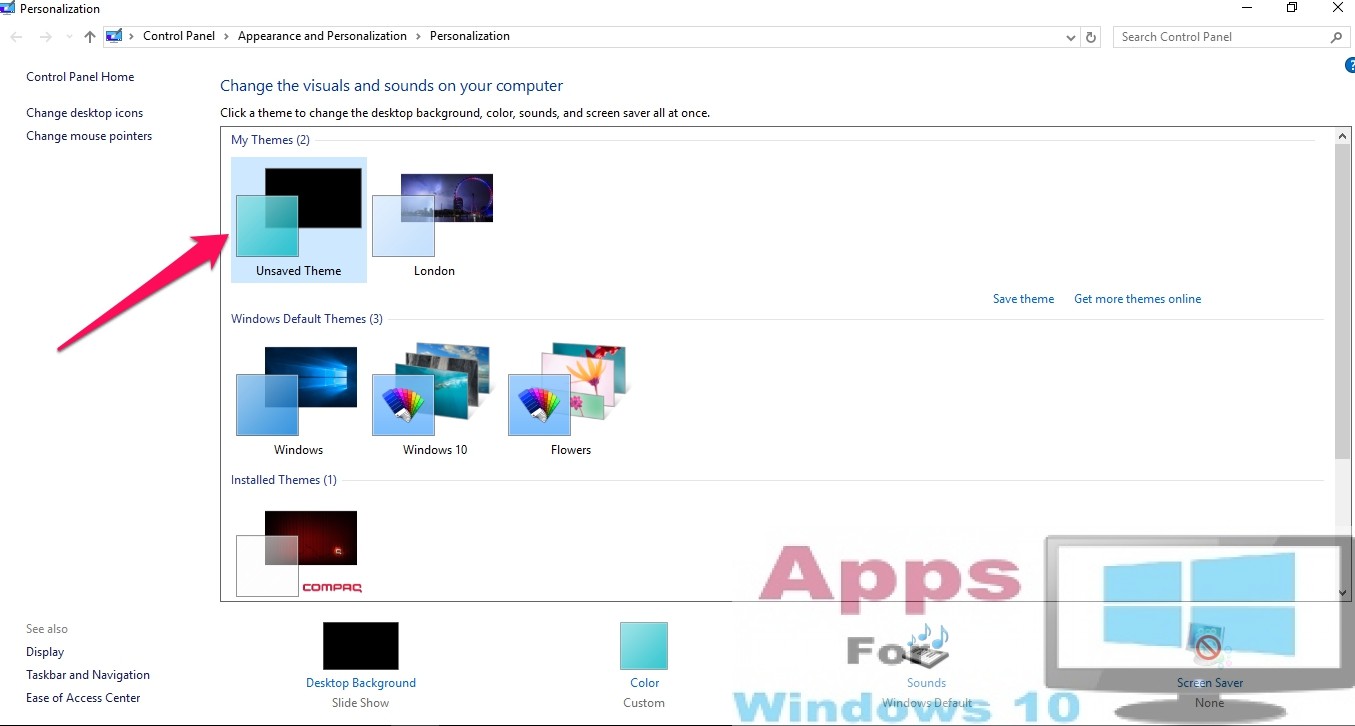
6 – Under My Theme section you will see Unsaved Theme option, right-click on it and pick Save Theme from the context menu and type theme name in the new window before clicking save button. Unsaved Theme has all theme changes you just made in previous steps, this is where you save it for installing and sharing purposes.
All done. Your personally created theme has been saved, now you can toggle between already saved them and the newly created one whenever you want. However, this method is only suitable for creating basic level themes as Microsoft hasn’t given more advanced options such as video & audio editing or inserting 3D images and icons. If you want to make graphically enhanced themes then download this Theme Creator app from Windows Appstore here. It has comprehensive set of tools that enables you to create 3D themes with stunning graphics but if you want to go with the simpler option then follow the method mentioned above.
For More, Read: Top 5 Windows 10 Nature Themes & Download WhatsApp 2.12.232 Beta update on Windows 10 Phones